Monday, November 30, 2015

Layout Update Mondays: Young Building

The Young Building under construction.
With a shortened holiday week, the only project I was able to start was construction on the Young Building.  As can be seen in the photo above, the core of the building is 1/2" birch plywood.  Eventually, I will add a veneer of brick along with the various details needed to complete the exterior of the building.  In the meantime, I needed the core of the building done so that I could build a tray which is attached to the module for the building to sit in.  This will allow the building to be taken off when the module is moved but also allow the building to fit nicely into the scenery when placed on the module.  Once this tray was completed, I glued it in place and then started to add foam around the rest of the module which will eventually be shaped to match the topography of the area.

Monday, November 23, 2015

Layout Update Mondays: More Landforms

Foam glued in place on the Slide and Mallary Complex Building modules.
With the trackwork installed, it was time to get back to completing all of the landforms on the remaining three sections of the layout.  (The Memorial Avenue and MOW sections had the landforms completed over the last couple of months.)  The process was fairly simple.  First, I added some wood strips for profile boards around the edge of each sections.  I prefer have something protect the foam on the sides of the module.  Layouts I have seen which simply use the foam as the edge of the module tend to show wear and tear a lot faster as the foam scratches and dents easily.

The next step was to glue foam insulation in place.  This was done with both carpenters glue and hot glue.  The hot glue acts as a temporary clamps so work on shaping the foam can happen quickly.  The carpenters glue takes a few days to dry but creates a strong bond.  I've tried hot glue on its own but found that over time (usually several years), the foam will delaminate - not ideal for a modular layout.

The final step was to shape the foam to the desired contours.  I used several tools like a back saw, key hole saw, and various surform tools to complete the job.

Shaping the foam with a surform tool.

The final contours on the module.

Monday, November 16, 2015

Layout Update Mondays: Trackwork Complete

An overview of the completed trackwork.
Well, progress has been a little slower than anticipated but a major milestone was reached over the weekend - all of the track has finally been installed.  It took a lot of time to add about 480 rail anchors to all of the sections of track but it sure looks nice.  As I installed the tracks, I added the electrical feeders but have yet to hook everything together.  The first train will have to wait a bit.

The siding on the Slide module.
While I was taking a few breaks working on the track, I was able to mock up the building, roadway, and landscape locations to make sure it all works as designed.  One part of the layout had been bothering me - the proposed paint shop building on the Memorial Avenue module.  The dirt access road from the MOW module was curving right into the back of the building and just didn't look right. I thought about eliminating the building all together and just installing a driveway but the resulting scene was too wide open.  So, I decided to freelance a bit and add a much smaller metal building.  I figure this could be the railroad headquarters building. Based on the mock up, it feels about right.

Now, back to the shop to finish the wiring!

Revised railroad headquarters building.

Monday, November 9, 2015

Layout Update Mondays: Paving Memorial Ave.

Adding drywall mesh to the road base.
Last week was a bit busy so I didn't manage to make too much progress.  The one project which I started was the paving of Memorial Avenue.  A few weeks back I had finished the landforms on the module and installed the curbing and catch basin for the road.  This week, I started with the paving process.  The first step was to add drywall mesh over the cork base.  This will reduce the potential for the roadway surface to crack in the future.  The next step was to glue in the various manhole covers and the final step was to add a base coat of Sculptamold to the road.  This took a couple of days to dry but provides a good base for the final road surface which I plan to create using drywall compound.  However, that process will have to wait until later this week...
Sculptamold applied to the road surface.
Another view of the Gate 9 entrance driveway.

Monday, November 2, 2015

Layout Update Mondays: Weathering Track

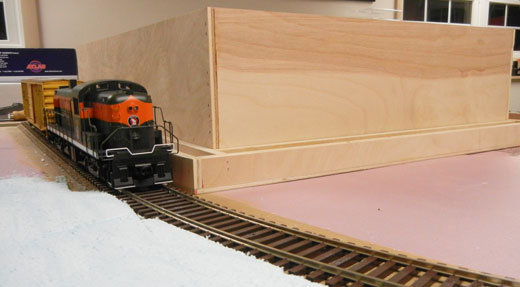
Track weathered and ready for service.
With track installed on two of the five modules, I decided to finish a small portion of the track on the MOW section to break up the tedium of installing rail anchors and distressing track.  Because of the larger scale, all of the details can be seen which makes the process of completing the trackwork a bit more labor intensive than working in smaller scales.  Below is the step by step of how the track will be completed on this layout.

Step 1: Distress track, detailed and ready for paint.
The first step, which was completed a couple of weeks ago, was to detail and distress the track.  In this case, I added rail anchors and then used a hobby knife and small razor saw to break up the square lines of the injected molded track.  Atlas had molded in some decent wood grain but since I was looking to build a beat up industrial siding, the ties needed to look a little worn down.  If I had been modeling a well-maintained Class I mainline, I probably wouldn't have taken this step.

Step Two: Paint Ties a light gray color as a base.
When looking at most side tracks, the older ties tend to turn a gray color. So the first step was to paint the ties a base gray color.  I mixed up random amounts of differing shades of gray and then painted the ties.  I tried to avoid a uniform color and have subtle changes in color along the siding.  In real life, ties don't weather at the same rate and are changed out at different times, leading to slightly different colors.

Step Three: Paint rails a rust color.
With the ties painted, the next step was to paint the rail, rail anchors, and tie plates a rust color.  While this takes a bit of time, neatness isn't hugely important. Often, the rust from the tie plates will weather the areas around it where it sits on the ties.  As the paint dried, I feathered the brown onto the ties near the tie plates to help blend all of the colors together.

Step Four: Paint some ties a black color to represent ties which have recently been replaced.
Speaking of replacing ties, one of the details I wanted to add was to make the siding look like it recently had some ties replaced.  In this case, I simply paint a few random ties a black color.

Step Five: After ballast has been glued down, dry brush black down the center of the rails to represent oil and grim left by the slow speed switching movements of the locomotive in this area.
After the paint dried for a day, I ballasted the track using Woodland Scenic medium gray ballast with a little bit of cinders mixed in.  After the ballast was allowed to dry for a day, the final step was to add an oil streak down the center of the ties.  While not as prevalent today with more environmentally friendly locomotives, it wasn't unusual to see a dark steak between the rails - especially in area where there was heavy, low speed switching - exactly what we have here.  I dry bushed black paint between the rail covering the ties and ballast to gain the final effect.  The finished trackwork can be seen at the beginning of the article.

Now, back to completing the trackwork on the rest of the modules so trains can be running soon!